Learn Bevy Book
Introduction to this book
- Bevy is a game engine that provides first-class low-level mechanisms for game developing.
- Instead of feature-full, Bevy is more like "mechanism-full".
- We may use these mechanisms to create our own features, strategies, fancy ideas, and eventually, games.
- Building games from low-level mechanisms is overwhelming at first. We want to alleviate this initial pain.
- This guide takes a top-down approach to give you a creator's guidance to learning Bevy.
- Some questions I will try to answer:
- How to start creating from scratch?
- When creating something, what mechanisms can you use?
- When you want to change something, what parts should you adjust?
Brief introduction to Bevy
From the offical website:
Bevy is a refreshingly simple data-driven game engine built in Rust.
- Compared with other game engines, Bevy is representing and tracking the internal data more elegantly:
- It helps you materialize the imaginary game world as concrete data.
- It organizes data as Entity-Component-System (ECS), a time-tested paradigm seen in many other engines...
- ...yet it leverages advanced Rust features to make it refreshingly simple for us to use
- How is my experience working with Bevy?
- Accurate: I fully control the code, the code fully controls the game world.
- Confident: less unexpected behaviors or mysterious bugs, thanks to Rust and Bevy's clear architecture.
- Creative: I can put things together creatively, or craft my own features, all as I want.
- Agile: I can build, publish and iterate a game real quick.
How to use this book
- This book begins with a tutorial that illustrates the creation process of a simple game.
- It also serves as a quick glance of the most important features that a game engine provides.
- You will understand when you want something in your game, which parts should you investigate deeper.
- Then you can refer to later chapters in any order that matches the journey of your own game creation.
- This book use lists intensively. This is for faster iteration of this book itself. It gives outlines and high-level understandings, but not extremely detailed explanations.
- The code of this book is open-sourced at this GitHub repo. When you see tags such as
ch01/step-1in this book, it refers to the corresponding git tag in the repo. Run this command to check out the code:git checkout ch01/step-1
Quickstart
As a quick start, let's make such a game:
- The game starts with a fox standing in front of you.
- You can watch her jumping around, exploring the whole ground.
- You can call her back to your front to pet her.
- After a while, she will start exploring the ground again.
Launch the game
- Install Rust: Rust official guide, Bevy Book installing rust and OS dependencies
- Start a new project:
cargo new learn_bevy_game cd learn_bevy_game - Add Bevy as dependency (with a link-time optimization):
cargo add bevy --features dynamic_linking - Apply an optimization for debugging experience: add the following lines to
Cargo.toml[profile.dev.package."*"] opt-level = 3 - Test the game (which is just a hello world program for now):
ch01/step-1cargo run # this could take some time; later builds would be a lot faster - Read more about the optimizations and building commands: bevy book, unofficial bevy cheatbook
Import a model
-
Setup a window, a main game loop, and other main features with
DefaultPlugins.ch01/step-2-1- Bevy at its core is just a skeleton for supporting the ECS paradigm.
- A new Bevy app contains nothing; we add ECS to it to give it meanings.
- A plugin is a pack of ECS items that work together to handle a specific aspect of the game.
- Window management, game loop, input management, logging, are all supported through some default plugins.
-
Download a model to
assets/models/Fox.glb.- You can design your 3D model visually with software like Blender.
- Then you can export it to formats like glTF (or its binary version
.glb) to use it programmatically in Bevy.
-
Load this model in Bevy app
ch01/step-2-2- In the code we add
setupas a Bevy system atStartupphase of the game (in Bevy, systems are just functions). - Scene is kind of like a container: we can put one or more models, lights and cameras in it. It can be exported by 3D modeling software, and loaded by Bevy.
- Here we load a scene with an
AssetServer, and spawn it insetup:commands.spawn(SceneBundle { scene: asset_server.load("models/Fox.glb#Scene0"), ..default() });
- In the code we add
-
Observe it in the window with a camera
- let's set up a default camera for now
commands.spawn(Camera3dBundle::default());
- let's set up a default camera for now
-
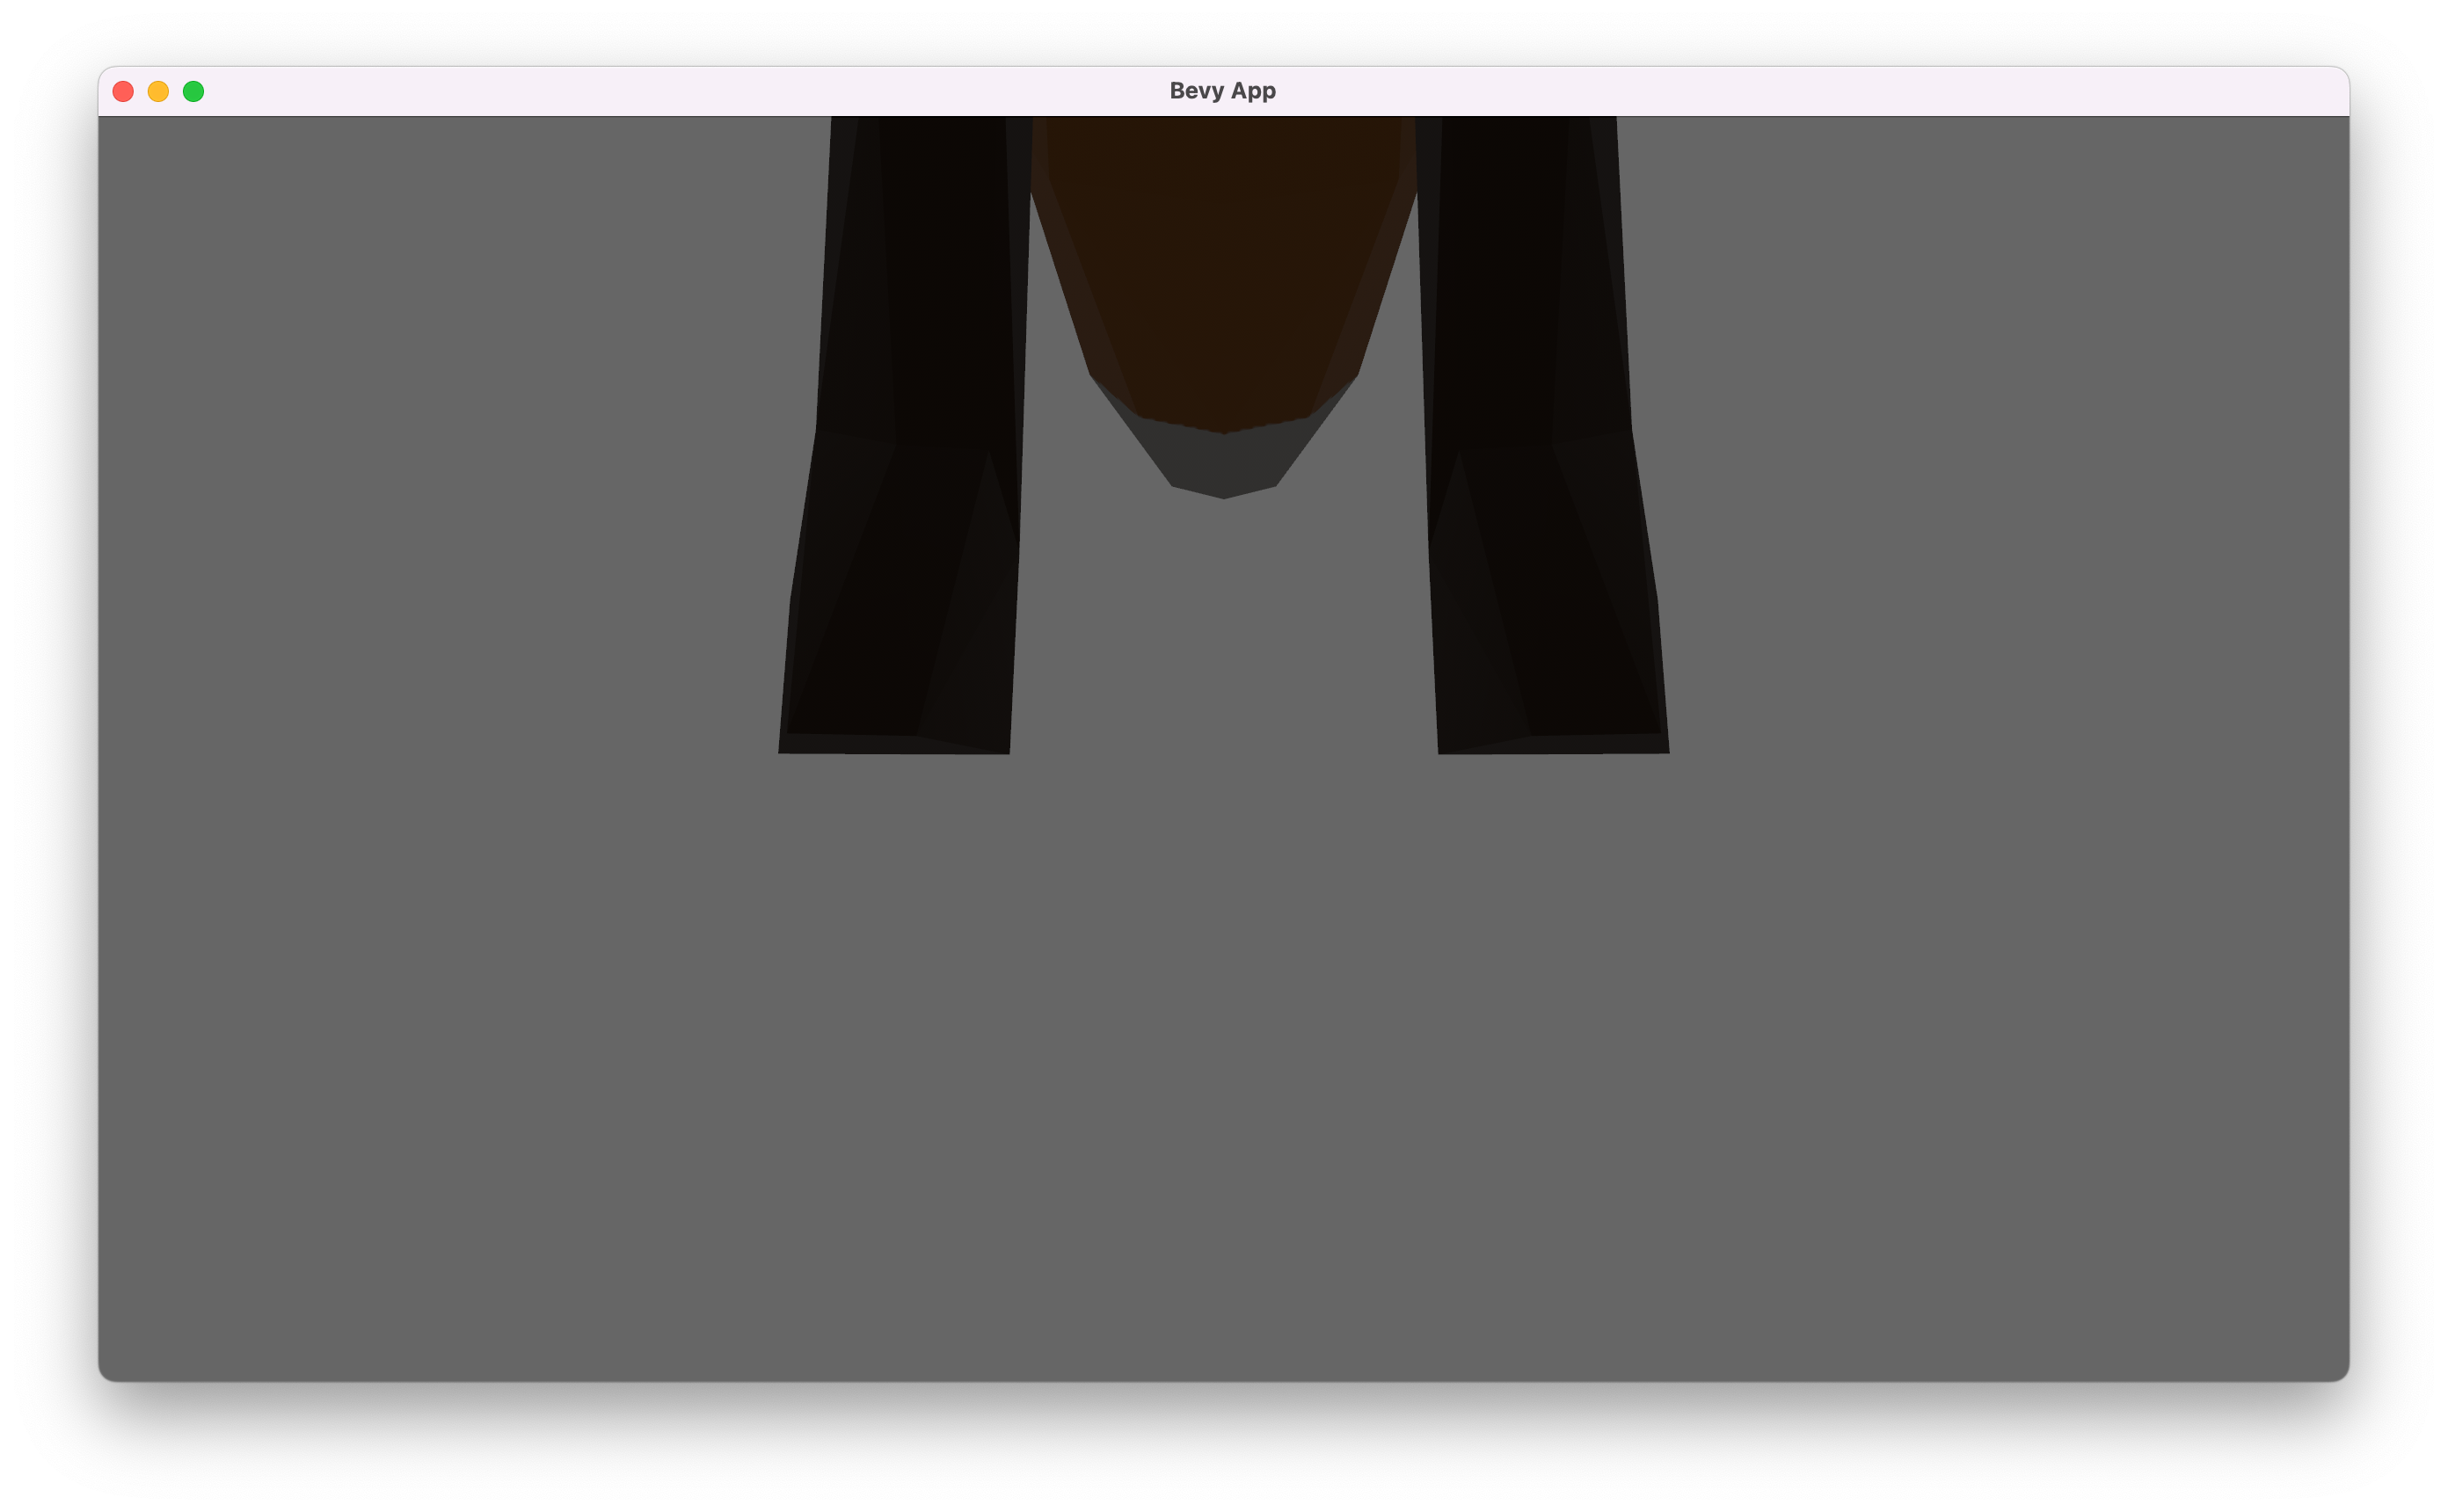
Now run the game with
cargo run, you'll see something like this:
Note about the
setupsystem:
- In Bevy, we define normal Rust functions to represent all kinds of behaviors in the game world. In terms of ECS, these functions are often called systems.
- We mainly have two concerns about systems:
- What are they supposed to do?
- When are they executed?
- Simply put, a system takes something in a game world, and do something with them.
- In our
setupsystem (the name is arbitrary), we take access to the asset manager, and load an external model from the asset folder. Then, with mutable access toCommands, we generate (spawn) the loaded model and a camera in the game world.- The access to what we need in Bevy (e.g. all components of a certain type, some global resources), is acquired through the typing of the function parameter. We will see a lot more examples later.
- When you register your function as a system using
add_systems, you are also describing when to run this system. Typical choices areStartup(run once at start up) andUpdate(run one time each frame).
See through a camera ch01/step-3
-
We are now already seeing the 3D game world in the window, through a camera.
-
The mechanism of a camera:
- Without a camera, the game world is just a bunch of data describing what everything is and where they are.
- A camera uses such information to compute what we should see from a certain point of view, as if we put a real camera in there.
- Specifically, given all the information of object shapes, positions, environment lightings, etc., the camera will compute colors of each pixels on the screen, as if we were seeing things directly from there.
- This process is called rendering, which is one of the most important concept of game engine.
-
The default position of the camera is now pointing at the legs of the fox. Let's first move our camera to a more comfortable position.
- In game engines, we often use the term transform to represent the position, rotation (or orientation), and scale (or size) of an object.
- If we want to move our camera to a different position and orientation, we need to define the
Transformcomponent on creating theCamera3DBundle:commands.spawn(Camera3dBundle { transform: Transform::from_xyz(20.0, 10.0, 30.0) .looking_at(Vec3::new(0.0, 5.0, 0.0), Vec3::Y), ..default() }); - Notice how we use
from_xyzto construct aTransformfrom that position, and then calllooking_aton it to define rotation. Also, this fox is too big, so we scale it down a little bit, also withTransform.
-
To understand what these numbers represent, we need to understand the coordinate system of the Bevy game world.
- This diagram from the Unofficial Bevy Cheat Book says everything about position. We use
from_xyzto define the position of an object (or a camera) in a right-handed Y-up coordinate system.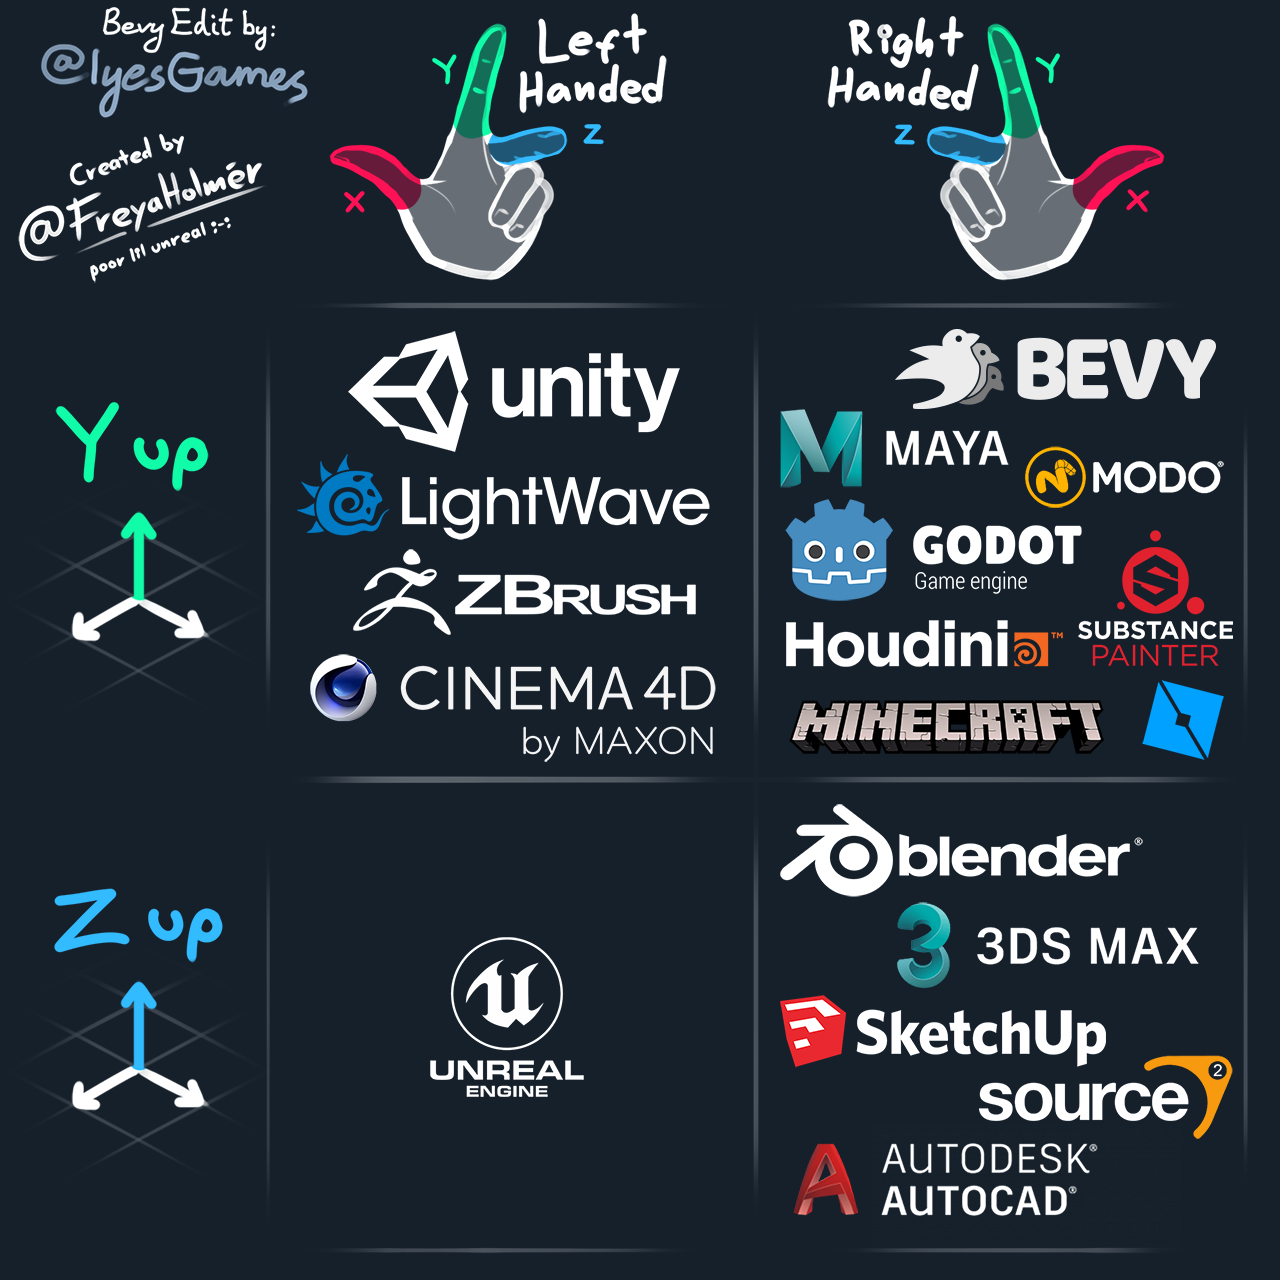
- The method
looking_atis a convenient way of defining a camera rotation. It takes two arguments:- The first argument
target, is the 3D coordinates of the position that you want your camera to point at. - The second argument
up, is used to define the up direction of the camera. Most of the time we want a horizontal view of the world, so we set the up direction toVec3::Y, i.e. the default up direction of the coordinate system. - You may notice that the
updirection isn't perfectly orthogonal with the target direction. This is allowed, as Bevy will calculate the internal representation of the rotation (a quaternion orQuatrepresenting an orientation) based on the plane formed by the two vectors.
- The first argument
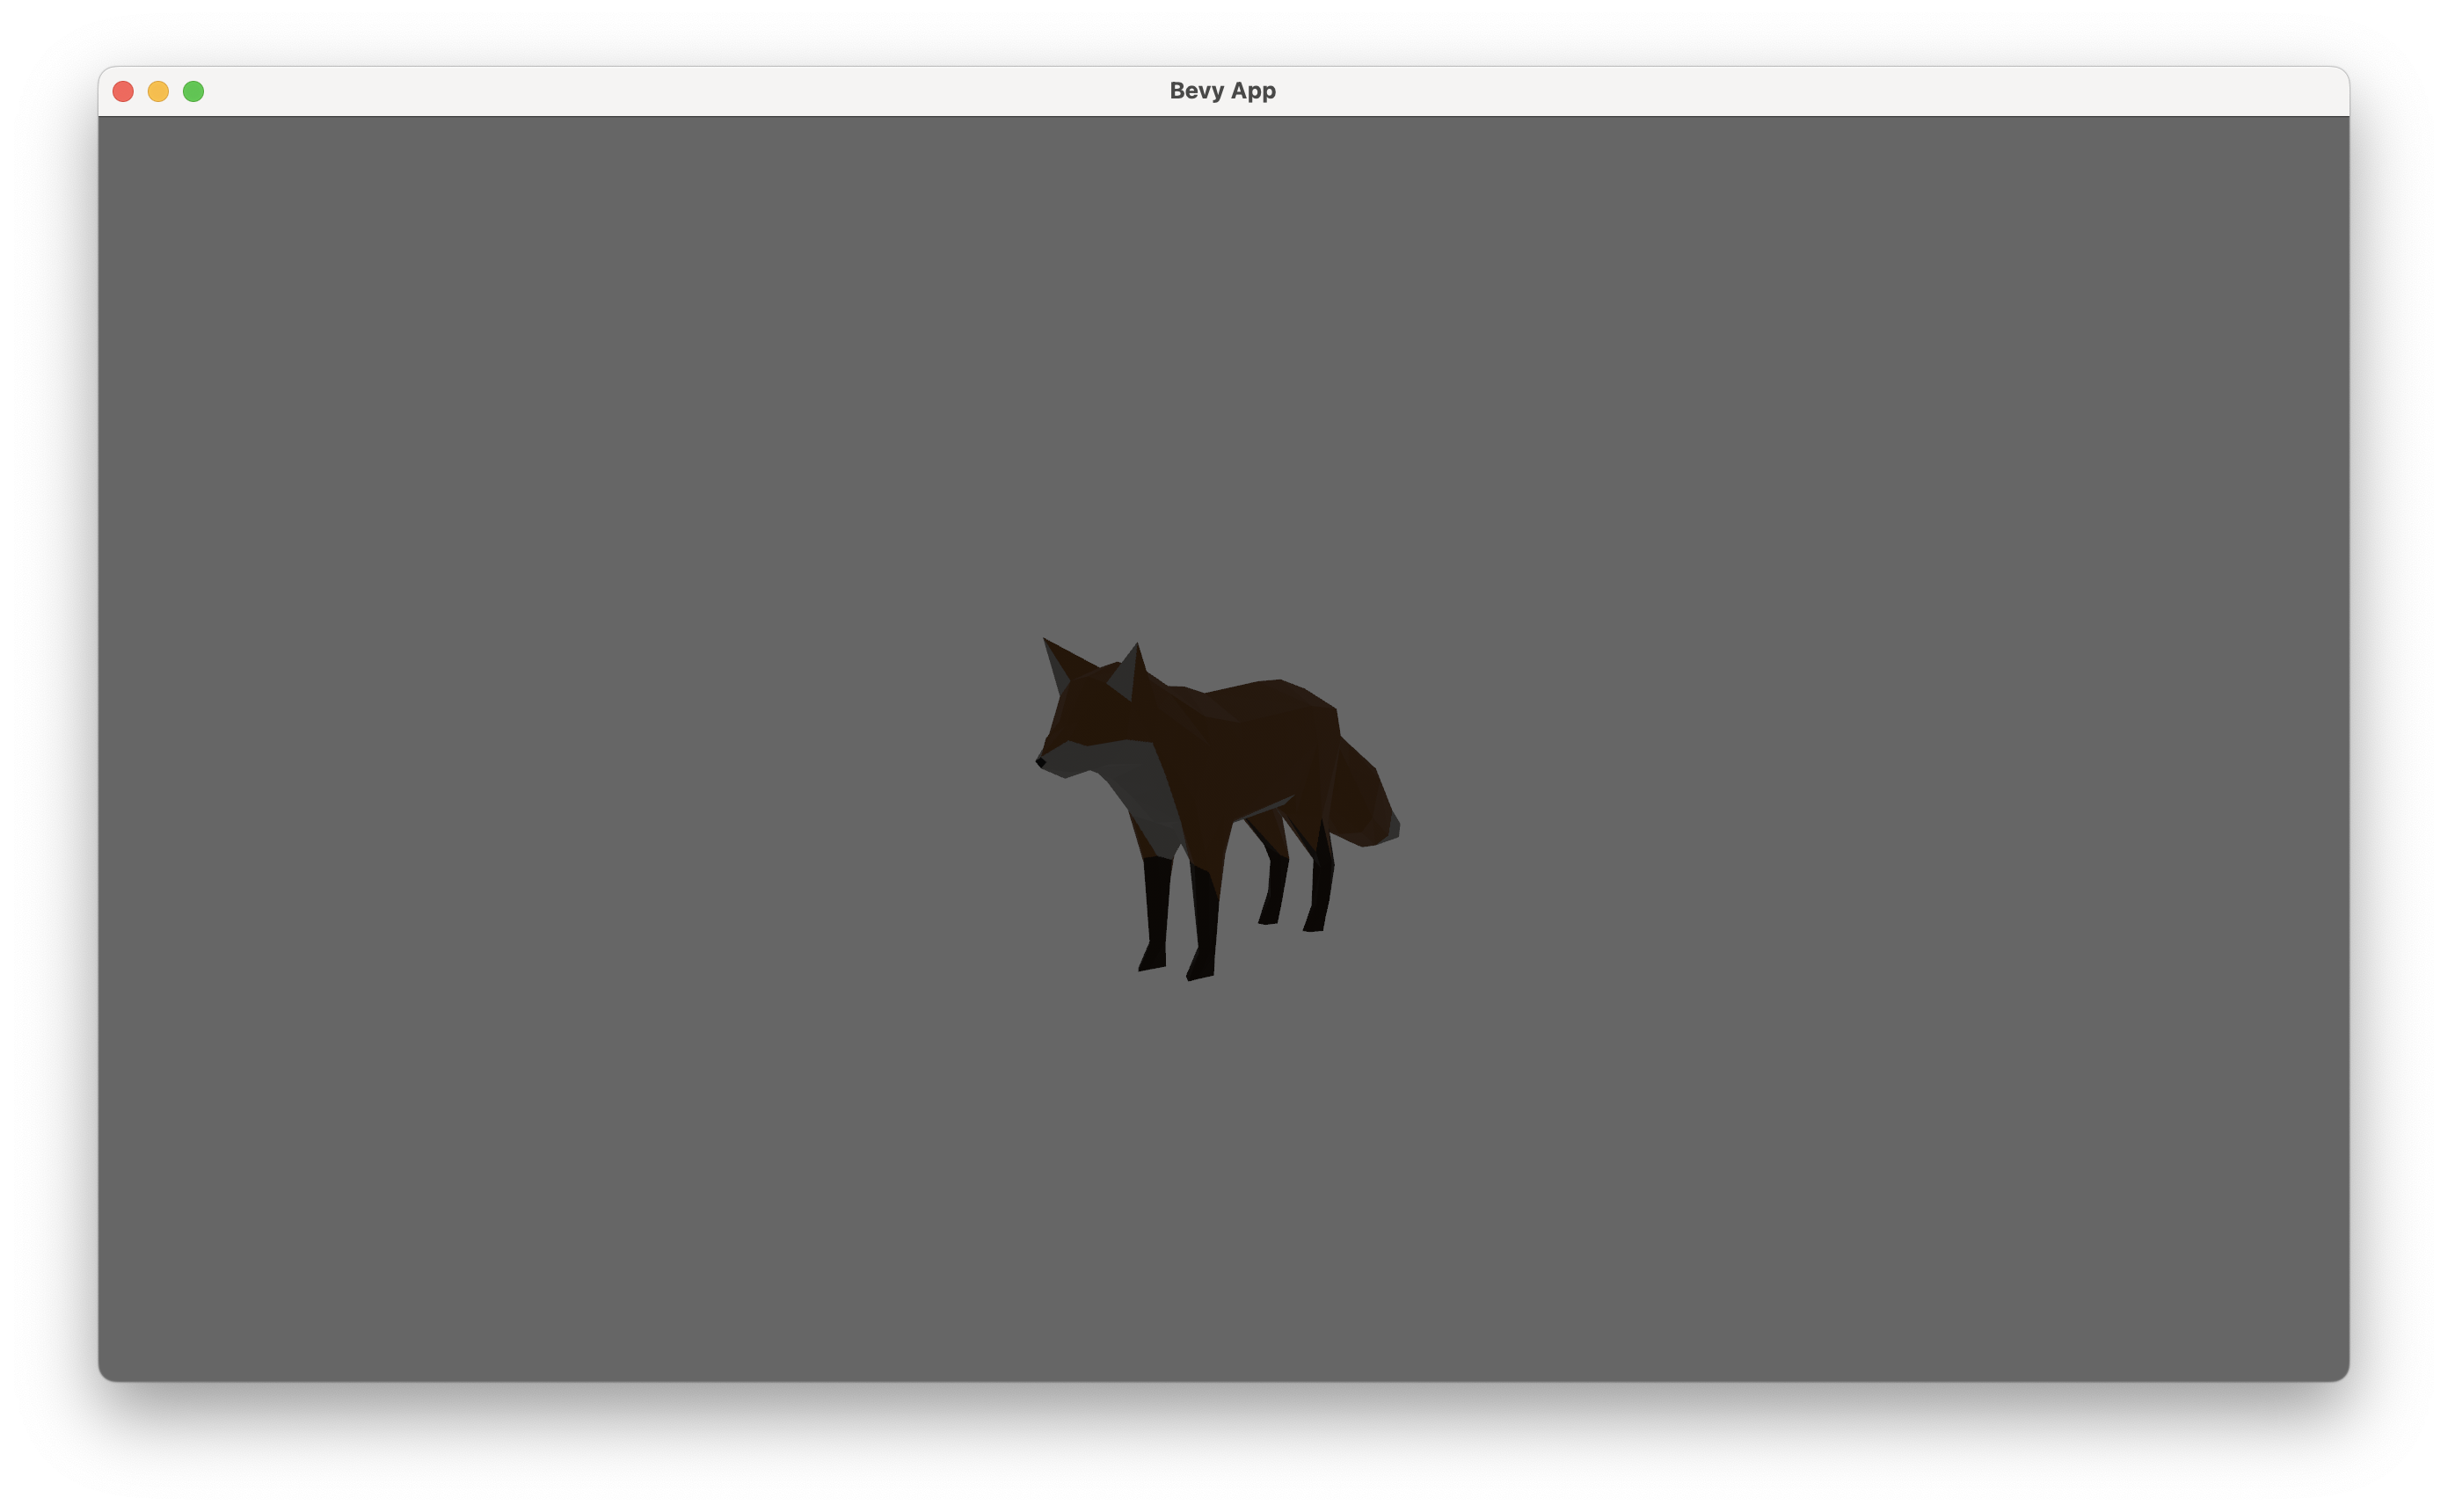
- As a practice, let's describe this scene in terms of coordinates:
- The fox is placed at the original, standing on the X-Z plane, facing +Z direction.
- The camera is placed at the front-left of the fox, slightly higher, watching the fox (the eyesight drops on the body of the fox, a little higher than the origin), keeping a horizontal view by using +Y as up direction.
- The scene looks like this:
- This diagram from the Unofficial Bevy Cheat Book says everything about position. We use
-
The fox still looks very dark. This is because there is no light in this scene. To make this scene look more natural and vivid, we add a directional light to it.
- Think of directional light as sunlight. It all comes from a single direction.
- Here in
setup, we add a default directional light (still throughcommands.spawn). The default light points at -Z direction, lightening the front side of the fox.
-
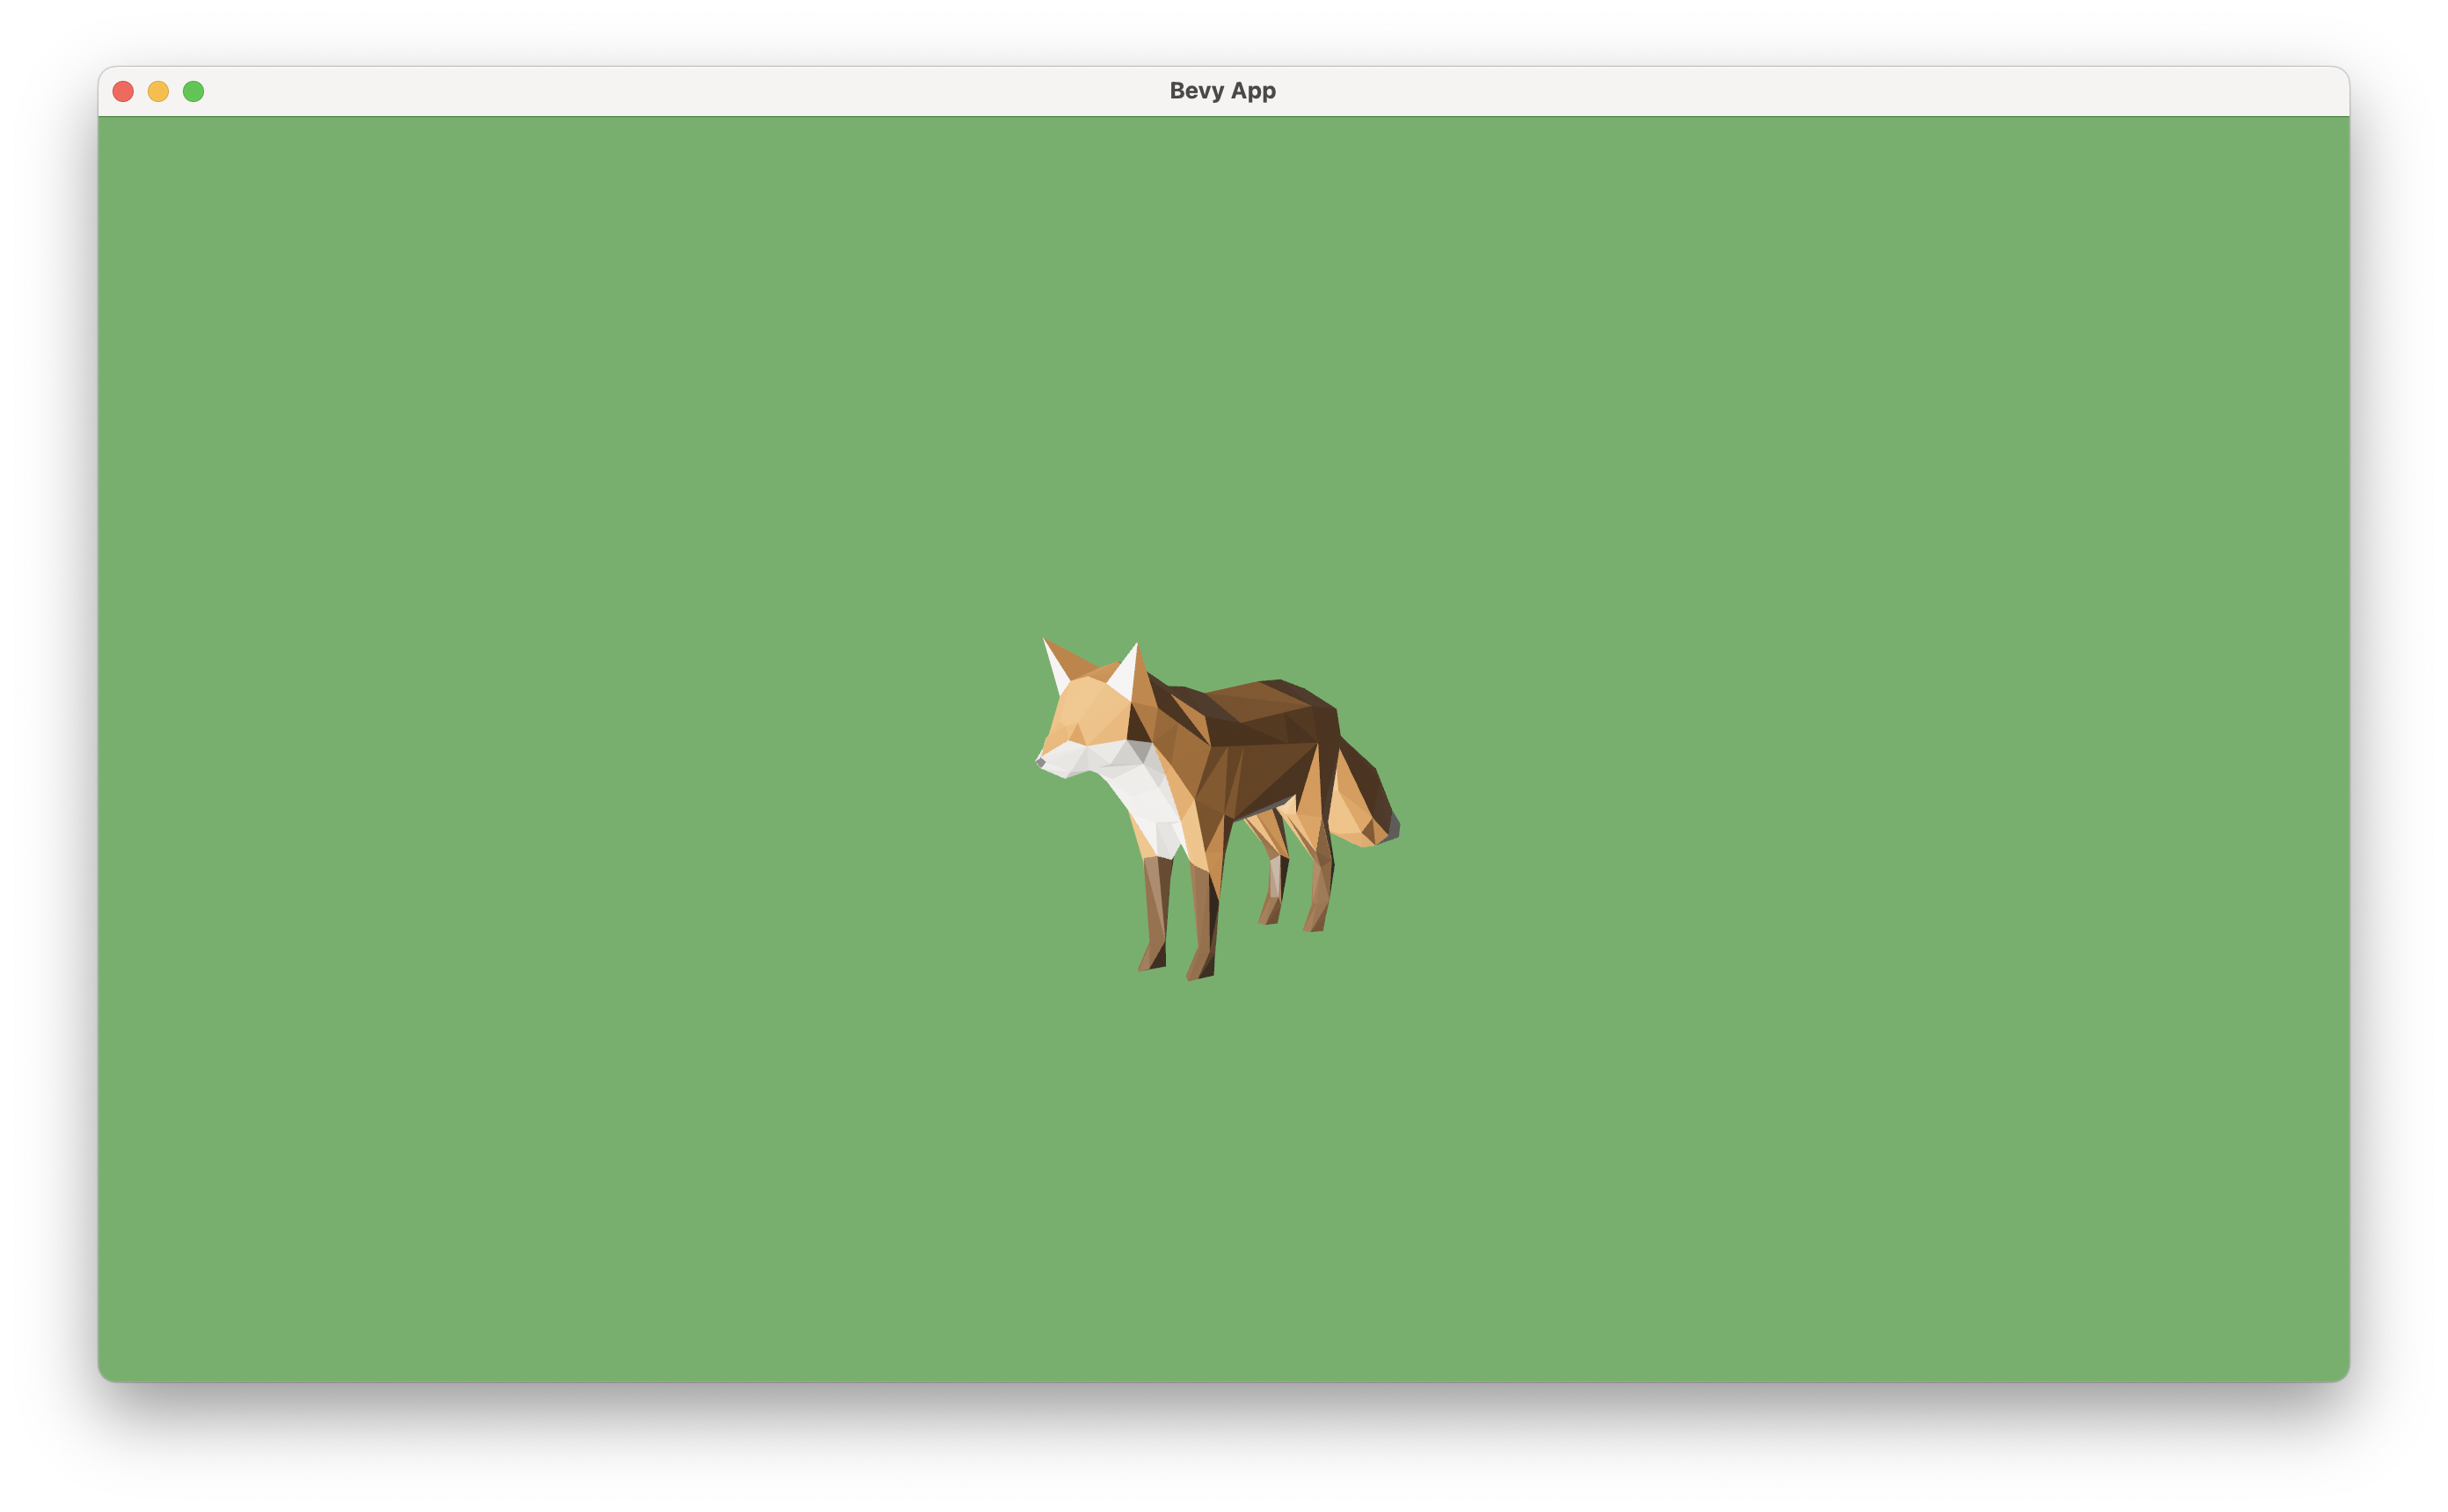
We can also apply some global settings to give this scene a more lively feel:
- Global settings are often defined as resources, as only one instance of a resource is allowed in the game world.
- We first set background color to green, to give us a feeling of grass. This is done by inserting
ClearColorresource. - We also set up an ambient light to soften the picture, by inserting the
AmbientLightresource.
#![allow(unused)] fn main() { App::new() .insert_resource(ClearColor(Color::rgb(0.4, 0.7, 0.4))) .insert_resource(AmbientLight { color: Color::WHITE, brightness: 0.2, }) // ... } -
The final scene looks like this:
Move objects
-
Till now, we've only been creating objects at the beginning of the game. Our game world is still uninterestingly static.
-
To make changes to entities in our game world, we write a system that mutates the components of our concern.
ch01/step-4-1-
If we want to move something around, the component that we want to modify is
Transform, which defines the position, rotation and scale of entities. -
To mutate a certain type of component, write a normal Rust function with following signature:
#![allow(unused)] fn main() { fn move_objects(mut query: Query<&mut Transform>) { for mut transform in &mut query { todo!("now you can mutate transform in place"); } } } -
Queryis one of the most important utility types in Bevy for checking and modifying the game world. You wrap the component type you want to operate in it, and Bevy will fill them in whenever this system gets called, making it possible for you to iterate over them and make modifications. -
However, there are many entities that can have the same type of component (e.g. cameras also have
Transform). What if we only want to make changes to just a few of them?-
The solution is, we tag these entites with a custom component:
#![allow(unused)]
fn main() {
#[derive(Component)]
struct Fox;  // an empty component; we use it as a tag

fn setup() {
    // ...
    commands
      .spawn(SceneBundle {
          scene: asset_server.load("models/Fox.glb#Scene0"),
          transform: Transform::from_scale(Vec3::splat(0.1)),
          ..default()
      })
      .insert(Fox);  // tag this entity with Fox component
}
}
-
-
Then we can make changes only to
Transformcomponents of entities that also have aFoxcomponent attached (note theWithtype here; this part of a query is called query filters):#![allow(unused)] fn main() { fn move_fox(mut query: Query<&mut Transform, With<Fox>>) { for mut transform in &mut query { // let's foward the fox a little transform.translation.z += 0.1; } } } -
Finally, we decide when this system is run. Let's start by running this system once per frame (i.e. on
Update):fn main() { App::new() // ... .add_systems(Update, move_fox) .run(); } -
Now hit
cargo run, you will see the fox slowly moving forward along the Z axis.
-
Note:
The Unofficial Bevy Cheat Book has a detailed explanation of the relationship between entities and componentes.
-
Let's practice the skill we learn with another example. We can see the fox eventually move out of sight. Let's change this by always pointing the camera at the fox.
ch01/step-4-2- This time we need to query two different things at the same time: the fox (for obtaining its location), and the camera (we want it to point at the fox).
- Intuitively, we may want to write the function signature as follows:
#![allow(unused)] fn main() { fn look_at_fox( mut camera: Query<&mut Transform, With<Camera>>, fox: Query<&Transform, With<Fox>>, ) { // do something... } } - We are almost there. There is still one issue with the current signature. We now have two parameters querying the same component, and one of them is mutable. It is impossible for Bevy to know if they will overlap, and mess up immutables with mutables (this violates safety rules of Rust, and can cause unexpected behaviors).
- To avoid this, we explicitly claim that the second parameter does not overlap with the first one, by adding a
Without<Camera>filter:#![allow(unused)] fn main() { fn look_at_fox( mut camera: Query<&mut Transform, With<Camera>>, fox: Query<&Transform, (With<Fox>, Without<Camera>)>, ) { // do something... } } - Now we can do what we want in the function body. Here we use
get_singleandget_single_mut, as we are sure there is only one entity each. We also uselet-elsestatement to extract both results at the same time.#![allow(unused)] fn main() { fn look_at_fox( mut camera: Query<&mut Transform, With<Camera>>, fox: Query<&Transform, (With<Fox>, Without<Camera>)>, ) { let Ok(mut camera_transform) = camera.get_single_mut() else { return }; let Ok(fox_transform) = fox.get_single() else { return }; camera_transform.look_at( fox_transform.translation + Vec3::new(0.0, 5.0, 0.0), Vec3::Y, ); } } - Hit
cargo runand check the result.
-
At this point, you may experience an odd feeling, that the fox seems to be standing still, and it is the camera that is moving. This illusion is caused by two main reasons:
- the lack of running animation of the fox itself
- the lack of reference points (like ground, trees, grass, etc.).
-
We will handle this in the next two sections.
Play animation
- https://github.com/bevyengine/bevy/blob/main/examples/animation/animated_fox.rs
Draw 3D objects
Manage behaviors with states
- Fox state: running, idle [TODO]
- Change state with time [TODO]
Respond to events
- Bind systems to keyboard events [TODO]
Final touches
Recap
- Game development mindset
- describe the game world
- game \(\to\) player: what will player see (with rendering)
- player \(\to\) game: how will our game react to players (with events)
- the evolution of the game world: state machines
Development and Debugging
- Game development is a highly iterative process
- you want to try out different ideas
- your vision and goal may change
- you may encounter unexpected behaviors or bugs
- You want a developing procedure that frees you from the fear of making changes or mistakes
- We can make this happen as early as possible, like now